Posts

Showing posts from 2014

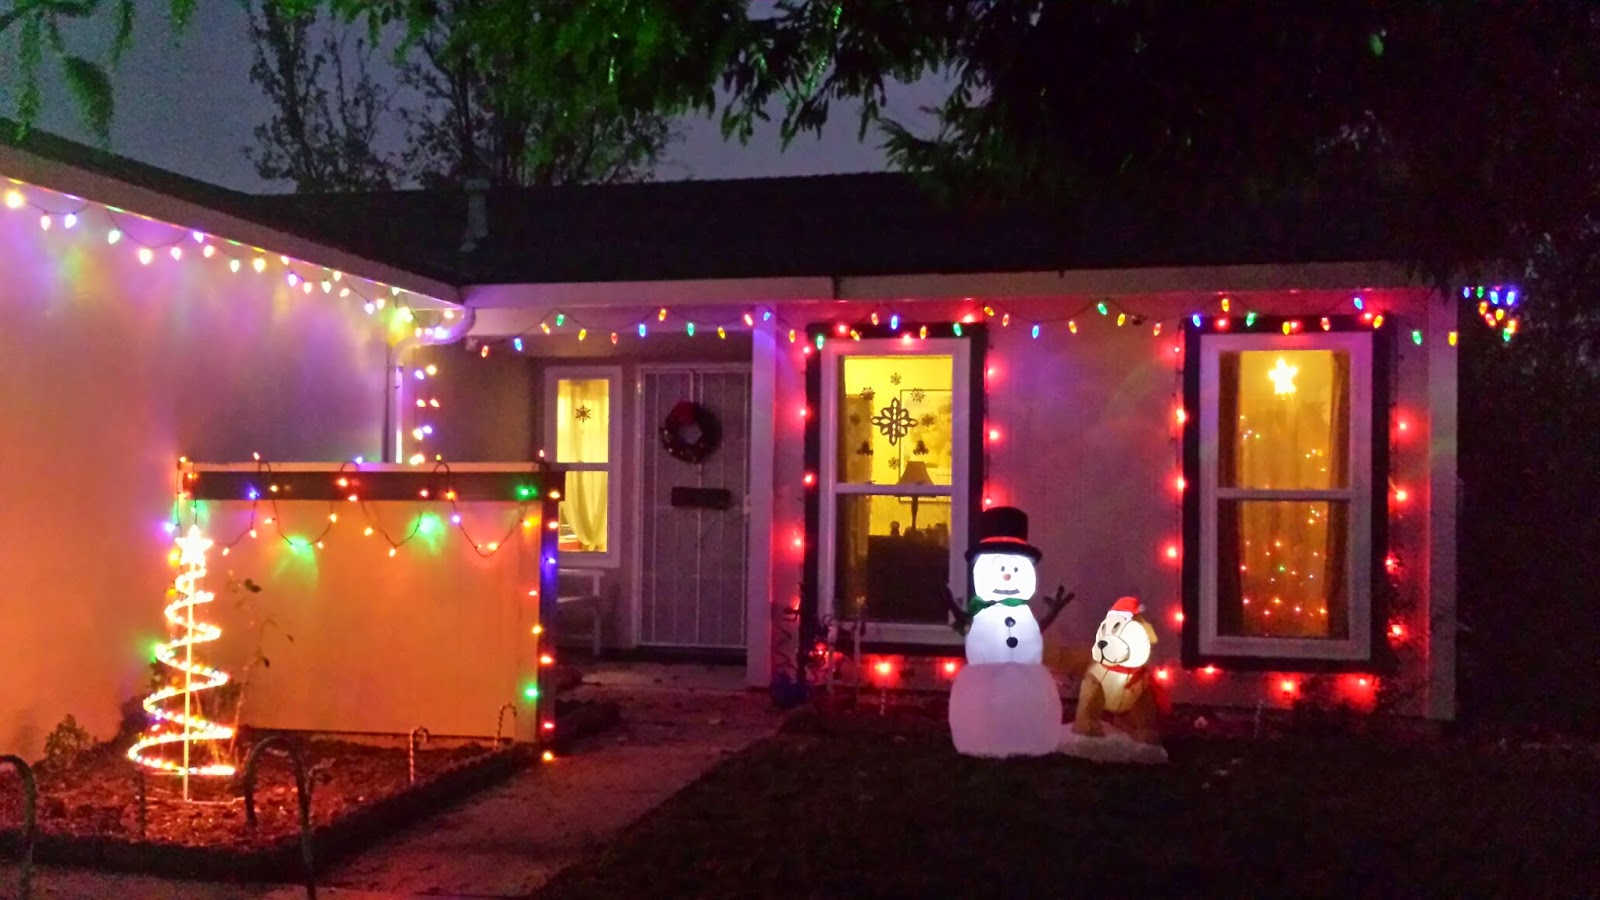
Christmas Threw Up on My House

Image
And I love it.

Organizing Craft Supplies on the Cheap

Image
I pulled out my craft supplies to start on holiday projects and groaned for the umpteenth time at the stuffed mess inside my craft storage totes. Not only did the small bins hold too much stuff, but they also held some of the wrong stuff. I often resorted to tossing small, random items into the bins when I didn't know what else to do with that stuff. And so my two bins have been a mess since before I lived on my own. In other words, for over a decade. I finally had had enough and tackled the mess. The biggest job was sorting through all the crayons, markers, colored pencils, pens and pencils at the bottom of this bin.  

DIY Napkin Rings with Plastic Wrap Tubes

Image
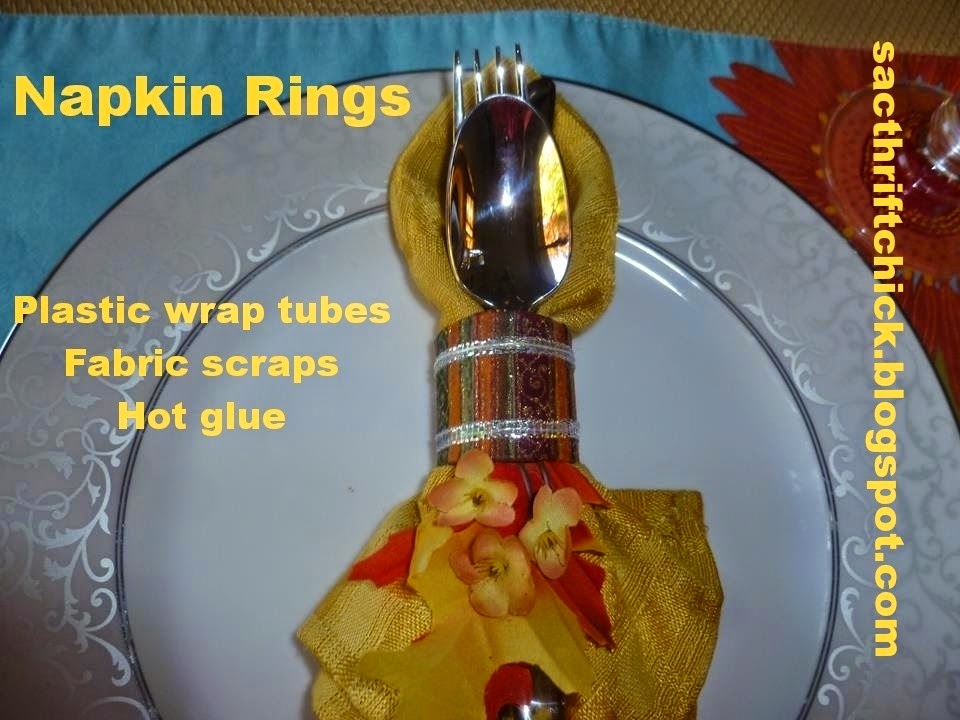
This idea comes from the creative brain of my mother. She made napkin rings at virtually no cost. In total she spent 65 cents for 1/8 yard of fabric for 12 napkin rings. Wow! For the ring itself, she used tubes from plastic wrap. They are sturdy and the perfect size to hold cloth napkins and silverware. She cut up the tubes, covered them in fabric (a combination of scraps she already had and the little bit she purchased), added a little flourish with artificial flowers, and voila! Easy peasy! She plans to add holly or bells at Christmas.

Ugly Christmas Sweater Party

Image
We had so much fun making Christmas gifts last year. For my family, we made everyone a totally awesome, super ugly Christmas sweater. A couple of the sweaters were hand-me-downs and the rest were thrift store purchases. We hit the cheap, ugly sweater goldmine at The Thrift Store on Greenback in Citrus Heights (at least half the price of the ones we found at Goodwill). For decorations, we bought a bag of Christmas trinkets for $5 at Goodwill and picked up a few stockings at other thrift stores. Fabric paint, bows and ribbons were collected from our hoard of craft supplies. We incorporated each recipient's name on his or her sweater. A couple of our creations close up: My mom knew were giving ugly Christmas sweaters as gifts, so she added to the theme with an Ugly Christmas Sweater Cookie Competition. Craft stores sell the kits with everything you need for around $10.

Goodbye Halloween, Hello Christmas

Image
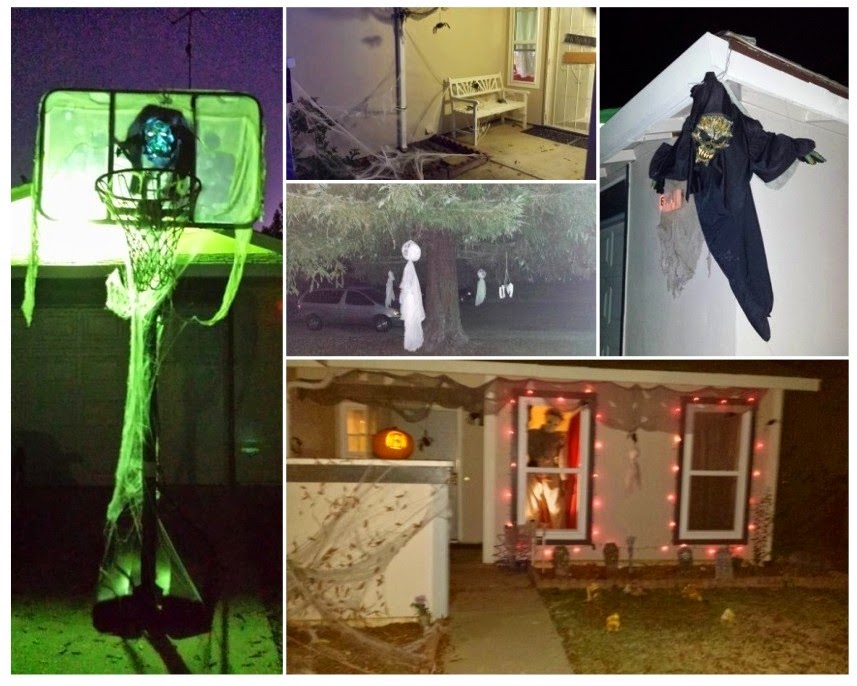
You may think I'm crazy, but I've already begun Christmas shopping. The same day we put away our Halloween decorations, I started looking at Christmas decorations online. In my old neighborhood, we had one of the best decorated houses for Halloween and Christmas. Actually, we were usually about the only house decorated for Halloween! My childhood neighborhood is far more festive, with some houses even decorating for 4th of July, Thanksgiving and Easter. Our house totally kicked Halloween butt this year, and the neighborhood kids really loved it, which always makes me happy. But last Christmas, I felt we were outshone by our next-door neighbors on both sides. So this year I'm getting an early start so I can make some nearly-free decorations. On the agenda: Giant lollipops, like the ones from this blog . I already have most of the materials I will need. Giant wooden star, inspired by the $5 one on this blog . I might be able to make one from our scrap wood

Halloween Decorations: How to Stuff a Life-Size Michael Myers

Image
Michael Myers is our grand finale of decorations, the big kahuna. The Michael Myers tradition started our first year in our first home. Aaron had the brilliant idea of stuffing Michael and placing him in my office window, which faced the yard. You had to walk right past the window to get to our door. You couldn't miss Michael; even people driving by on the street would slow to check him out. On Halloween, Michael amused many and frightened some. A few groups wondered out loud if he was real. Suddenly Michael would move (thanks to Aaron hididng in the office) and screams would ensue. Eventually, Aaron closed the blinds, quickly un-stuffed Michael, stuffed himself inside and hid behind the front door. I would answer and Aaron would creep out or jump out. More screams. The next day, we had a knock at our door. A group of kids asked Aaron if he could put the costume back on and chase them. But of course! The group waited outside, expecting Aaron to come out the front door

Free Visit to the California Automobile Museum

Image
"Free" just makes everything more enticing, doesn't it? As part of its Audience Appreciation Month, The Sacramento Bee hosted a free event at the California Automobile Museum on Thursday night. I predicted the event would be primarily attended by an older crowd, and I was not wrong. I don't know why more "young people" don't attend these things, but I don't mind trailing behind a group of white hairs. By comparison, I must have looked positively youthful. I found out about the event on the BeeBuzzPoints website , which is a great resource for local events and contests. The Bee's business writer and car expert , Mark Glover, gave a short talk about his background, which coincidentally, I related to. Glover said he's originally from Dayton, Ohio, and when he meets people from Dayton living in Sacramento, they often came here via transfer to McClellan Air Force Base. Both my grandfathers worked at McClellan, and my dad's family is fro

Opening Day Hiccups and Blondie at TBD Fest

Image
If I'm being perfectly honest, I really only wanted to go to TBD Fest for Blondie. The majority of the music at the fest is just not my thing. I get how important and cool this music, art, food and technology fest is for Sacramento. But for me, waving a glow stick around to techno music is the stuff of nightmares. Still, I entered a Capital Public Radio contest online and lo and behold, I won two three-day passes. Then I kinda sorta felt like a jerk because like I said, I only cared about Blondie, and I know so many people who really wanted to attend this thing. Held in the dirt at River Park in West Sacramento, TBD Fest was scheduled to start at 3 p.m. on Friday with local band Autumn Sky taking the stage at 3:30. Since I actually like Autumn Sky (though I'm partial to her earlier solo stuff) my husband and I arrived by 3:30. And then we stood in line, in the hot sun, for the next 30 minutes. For some reason, no one was getting in. Nothing was happening

Singer-Songwriter Shannon Curtis in My Backyard

Image
Sometimes you just instantly fall in love with a song or musician, and that's how it was for me with Shannon Curtis. I can't recall exactly the year I first saw her, but I know it was roughly 12 years ago. I remember entering Heritage Festival on the grounds of Gibson Ranch and hearing a pop rock band with a female singer who could actually really sing. That band was Paradigm. I was immediately hooked. And because I co-ran a local music website and zine that did CD reviews, Paradigm sent us their press kit, so then my broke self had Paradigm music to listen to all the time . Eventually Paradigm parted ways and Shannon embarked on a solo career in the vein of Norah Jones and Sarah McLachlan. The first time I saw her perform with just a keyboard, I was blown away. I continued to catch shows here and there and do some press when I had a new music column.  I turned my husband onto Shannon's music, and despite his protests when we first met that he didn't really like

Halloween Decorations: Floating Goblin

Image
We like our Halloween decorations creepy, not cutesy. Sure, sometimes little kids are afraid to come up to our door, but with prompting from their parents, they almost always get over it. We have free candy, after all. This floating goblin is a simple, thrifty DIY Halloween decoration that takes just minutes to make. All we used was a blue rubber mask from the 99Cent Store, a bug zapper lantern and a hooded, black Halloween costume top in a thin, breathable fabric from the 99Cent Store. We hung the zapper lantern, which is encased by proctive bars so we've never had to worry about it burning the fabric. We chose the zapper because it gives off a nice blue glow. A porch light with a black light in it would also achieve this affect. Then we stapled the hood of the top around the edges of the mask. To secure the mask in place, we fit the mask's flexible head strap around the lantern. Finally, we just pulled the shirt over the lantern. We probably could have d

Halloween Decorations: DIY Flying Monster

Image
He's made children cry. He's one of the reasons we get so many "badass decorations" compliments from adults. He's our flying monster, and he only cost a few bucks to make. What You Need: 1 Black grad robe (Check thrift stores, if you don't have one lying around.) 1 Over-the-head mask (Preferably with a hood) 1 Pair of monster gloves Lots of safety pins 1 Plastic bag Newspaper or tissue paper 1 Wire coat hanger 2 sticks (We used the wands from old blinds) The Basic Steps: Fill out your mask with something bulky so it has dimension. We actually have a block of wood in there, but without pulling apart the monster, I couldn't tell you how we managed that. You can fill a plastic bag with newspaper, seal the bag and then safety pin or sew it into the inside of the mask.    Safety pin the collar of the graduation gown to the neck opening of the mask. If your mask has a hood -- as ours does -- safety pin the hood to the gown. Cut a small

Chalk It Up 2014

Image
My face melted and I was generally blinded by the bright sun, but I still enjoyed seeing the sidewalk chalk drawings and listening to live music at Chalk It Up on Saturday afternoon. Chalk It Up is an annual Labor Day weekend festival at Fremont Park that benefits youth art programs in Sacramento. This year we only caught two bands, The Old Screen Door and Musical Charis. I snapped some quick cell phone pics of the bands and of my favorite sidewalk art. The Old Screen Door Musical Charis

No Sew Instructions: Turn a Skirt Into a Window Valance

Image
T I've always wanted cherry-print curtains in my retro-styled kitchen. My narrow, corner kitchen window, however, does not work with most curtains. Hanging a sheer curtain panel with a tension rod was the best way to let light and airflow in while still providing privacy, but it left the window looking unfinished. I thought a valance would complete the look, but also knew I would either have to make it or cut a normal-sized kitchen valance in half to fit the small space. Then, while sorting clothes to give to charity, I came across my cherry-print skirt, size 3. Loving the print, but knowing I would likely never fit into the skirt again, I decided to turn into a window valance. Like many of my DIY projects, I made this one up as I went along, with basically no plan. Because I used sewing pins and skipped the actual sewing, crafting the valance was pretty simply.

Cosmetic Companies That Don't Test on Animals

Image
I originally wrote the following article as an assignment for a client, but was a little surprised to discover the client didn't actually want me to name names -- advertisal relationships and all. Rather than rewrite an entire article to avoid offending a makeup line by stating the facts about its safety testing, I decided to throw it up on my blog. I also have another reason for sharing: The information I learned in my research made me examine the makeup I buy. With the selection of cosmetic lines that don't test on animals, there's really no reason I should be supporting a company that still tests on animals.  If you're looking for that perfect volumizing mascara or blemish-concealing BB cream, but want to ensure the product is cruelty-free, good news: As of 2014, over 1,000 beauty and personal care companies don't test on animals, according to People for the Ethical Treatment of Animals. The bad news is that some big-name brands still test

My Childhood Home, Furnished by Craigslist: The Kitchen

Image
My kitchen is not my favorite room in the house. It's outdated. Honey-oak cabinets aren't my preference. And I could really do without the old, blue countertops. I haven't done a lot of decor-wise to the kitchen, but I have added my mark here and there. Before we moved in, I planned where everything would go (hello, obsessive compulsive personality!) and realized right away we needed two things: a pot rack and a rectangular table. As much as I love Gramma's round/oval table, I needed a table that could sit flush with the wall to maximize the limited space. 

How to Turn Soup Cans Into Candle Containers

Image
This craft is an oldie but a goodie. Using tin food cans, you can illuminate your favorite outdoor space. All you need is a nail, hammer and optionally, a drill to turn soup cans into candle holders.

Outdoor Oasis: How to Turn a Futon into a Porch Couch

Image
I refer to my back porch as my outdoor oasis, not because it's the most beautiful or detailed, but simply because the furniture is comfortable and the atmosphere is peaceful. It's where I go to unwind, relax and read. And now thanks to a recent project to turn a futon into a porch couch, I have the ultimate reading and napping spot. Last year, I wrote about getting rid of my busted up outdoor furniture, updating the salvageable and buying a futon to to use as my new outdoor couch . Shortly after I painted the $20 queen-size, solid-wood futon with outdoor white paint, I got busy getting ready for my move and never updated with the final result. I love it.

My Childhood Home, Furnished by Craigslist: The Family Room

Image
The family room is where the music happens. It's where marathon hours of video games are played. It's really more my husband's room. I mainly use it to watch Jeopardy because it's easier to get ABC reception in that room. Sometimes I play Jeopardy on Playstation, too. This room has had the most transformations in the 7 months we've lived here. First, it was the video game and Netflix room, back when we had the most massive beast of an old-school TV you've ever seen. When my brother moved in, we sold most of the furniture in the room, gave away The Beast and moved in my office furniture. About a month later, our other roommate moved out, and I got my office back. Without The Beast taking up a quarter of the room, furnishing the family room was pretty simple.

My Childhood Home, Furnished by Craigslist: The Living Room

Image
Since we moved into my childhood home on Halloween, I've been busy furnishing, decorating and then re-furnishing and re-decorating as we replaced the old with the new-to-us. I made about $1,000 selling furniture and random items in the move, but have only invested a very small portion of that into the new house. I am finally getting to the point where the house is just about done. I love many things about this house, and having a living room and a family room is at the top of that list. Growing up in this house in 90s, the living room was the formal room. A floral sofa, matching wingback chair, curio cabinet filled with mom's collectibles, a beautiful old piano and lace curtains filled the space. Entering that front room, you wouldn't even know two kids lived there. You wouldn't see a teenager parked in front of the TV, video game controller in hand, soda bottles scattered around him. That mess was hidden in the family room. And while I don't have a tee

Santa Cruz Anniversary Vacation

Image
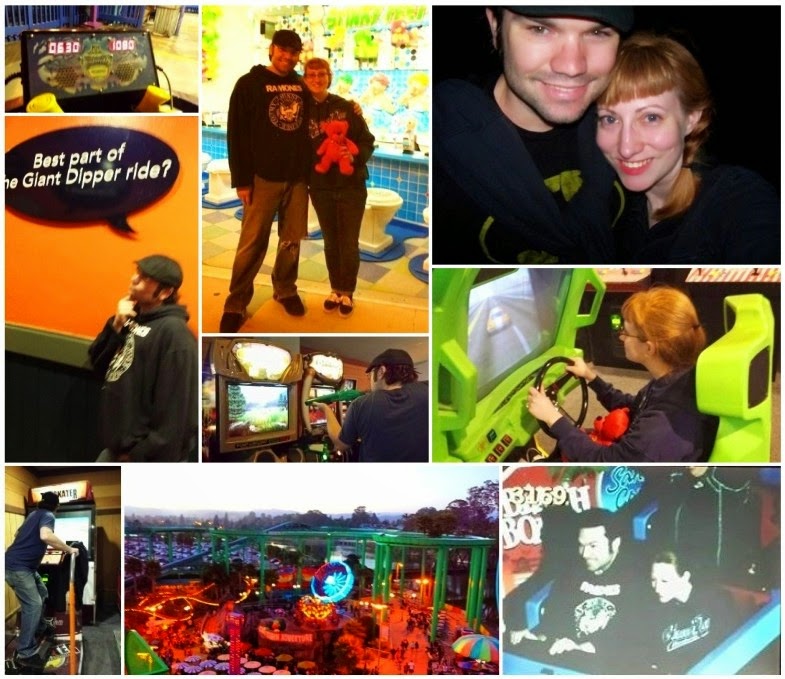
For our 7-10 anniversary ( 7 yea rs married, 10 together) , we s tayed three nights in Ben Lomond, which is in the Santa Cruz mountains. I composed a post det ailing how we made it a fun, low-key , thrifty vacation, but once again, Blogspot has a mind of its own , messing with my uber simple font settings . So instead of words, I just give you pictures. Enjoy. Santa Cruz Beach Boardwalk Natural Bridges State Beach

How to Make a Seashell Wind Chime

Image
Some crafts do not go as planned. Some crafts cause curse words to fly out. Some crafts cause physical pain and even leave a mark. My seashell wind chime was one such craft. See, while browsing Big Lots one day, I came across a selection of seashell wind chimes, very reasonably priced. I exclaimed, "How cute! Wait, I could make this! It's just seashells and twine. Just drill some holes." My husband agreed. "Yea, that'd be hella easy. I could help you drill them." Ha. Since I got the idea for this craft at a store, I didn't even think to see if other people made such wind chimes. (A Pinterest search shows, yea, they're kinda popular.) I decided I could just wing it. So I pulled out my seashell collection, dating back over 20 years, gathered from the coasts of California, Hawaii and Florida, and selected 20 shells to use. And these are the steps I learned to do ... and not to do.

How to Give to Charity When You Don't Have a Lot to Give

Image
Talking about our charitable contributions is not something my husband and I do a lot of. For us, it's mostly a private matter, but we do like to promote the charities we support. When you don't have a lot to begin with, supporting a charity is not always as easy as writing a check. Giving to charity, however, doesn't have to be about money. Charities need physical items -- new and gently used -- and you can supply these with a little shopping savvy. My first tip may be obvious to most deal-hounds, but it wasn't always to me: Sign up for store mailing lists left and right and use those points and coupon offers to shop for charities. It's so simple, and I find, really fun and fulfilling. My husband and I favor women and children's charities, such as W.E.A.V.E. and the Sacramento Children's Receiving Home , both of which have wish lists of needed items. At Christmastime, they have gift wish lists . It's important to check wish lists as charities

End of Another Venue Era: Slime Girls and The Dollyrots at Luigi's

Image
It's always sad when an any local music venue closes in Sac, but especially when it's an all-ages one. I admit that, I, personally, was never that big of a Luigi's fan, but I appreciated it for hosting all-ages shows. Whereas 15 years ago, Capital Garage meant the world to me, and before that kids had the Cattle Club -- or The Loft, depending on your allegiance -- today's under 21-crowd had Luigi's. Luigi's was by no means an ideal room, but it did the job, with a real stage, a not totally terribly sound system, and a dance floor that was better than what the other small-sized venues offered. If I was 15, 16 or even 20 again, I probably would have loved the venue, and would have championed it, and then mourned its loss, in the same way I did for so many like it back in the day for the LoCal MuSac E-zine and website. But honestly, I'm not that high-energy punk princess anymore. I'm 30, and not in the best of health. Just thinking about

Not Your Ordinary Wedding Budget Tips: How to Save Some Serious Cash

Image
My fairy-tale wedding -- which included a couture wedding gown, buffet dinner with table settings for 150 people, and a ceremony at a church that is so popular, it is booked every Saturday of the year -- cost under $8,000. When you consider that the average cost of a Sacramento wedding is over $31,000 , I consider that pretty impressive. Now, you can find many budget-saving wedding articles on the web and in magazines. In fact, some of the ones you come across, might even be written by moi. Professionally, I've written countless wedding articles with tips backed by well-known experts. But those are not the tips I'm including here.   These are the tips for someone on a limited budget who doesn't need or can't afford to have professionals run the whole show. These are the tips that require doing your research and asking friends and family for help. These are the tips that saved me thousands.

Carnival Themed Wedding Ideas

Image
As a guest, one of the funnest (yes, I said "funnest") weddings I've attended was my stepsister's carnival themed affair at Grace Vineyards near Sacramento. She had many simple and festive DIY details that really carried the carnival theme throughout the day. SisterLee Photography Upon entering the main grounds, guests walked under a fabric pennant banner (by Hey Let's Make Stuff ). A colorful signpost directed guests around the expansive, carnival themed grounds. SisterLee Photography Pinwheels lined the wedding aisle. Fittingly, the bridesmaids also carried pinwheels instead of flowers, and the groomsmen had petite pinwheel boutonnières. SisterLee Photography After the ceremony, guests found their way to their carnival themed tables with name cards attached to Cracker Jack candy boxes. SisterLee Photography The cheerful carnival themed wedding centerpieces included pinwheels, giant lollipops, fun stra

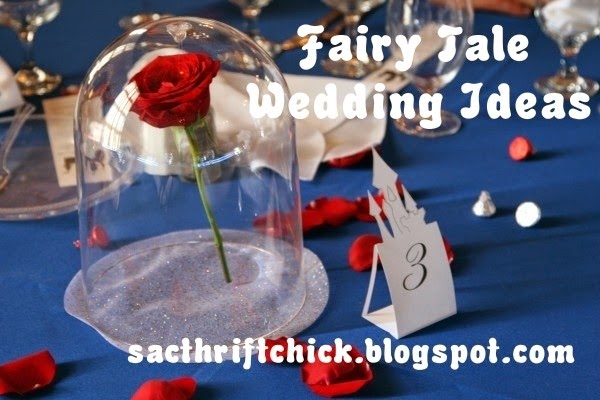
Fairy Tale Wedding Ideas: 5 Tips to Inspire Your Special Day

Image
When my husband proposed, I instantly knew my wedding theme: fairy tale. When I went to execute that theme, I found a lot of ideas for Disney-themed weddings, but fewer ideas for fairy tale weddings without Mickie, Minnie or Cinderella stamped on the decorations. For my theme, I incorporated bits from Disney, but nothing was officially Disney, which kept the costs down and – in my mind, at least – kept the day a bit more classy and less cheesy. 5 Fairy Tale Theme Wedding Tips Set the Fairy Tale Theme and the Formality of the Occasion with Invitations. We kept the theme going with our reception cards, which began "Be our guest. Join us for dinner and dancing ..." Make a Statement with Fairy Tale Centerpieces. For my Beauty and the Beast enchanted rose centerpieces, we used plastic cake domes. My florist removed the bottoms and suspended each rose with fishing wire and a dollop of hot glue. After the wedding, I recouped some of the cost b